UPI means unified payment interface. It’s a new way of transferring and receiving money directly into your bank account instantly. It is like IMPS (Immediate Payment Service) but with new and simple user interface. Every transaction is as simple as sending an email and best thing is you don’t need to add payee details like Full name, Bank name, IFSC code, Account number, MMID etc.
For sending and receiving payment you can use any Indian bank UPI app with a unique username called VPA (Virtual Payment Address). For example username@pnb, username2@sbi
though you can also use Aadhaar number to receive payment and other old methods like Account number and IFSC code, MMID and mobile number.
Even when you are doing online shopping you don't need to enter your bank name, your name, debit card number, card expiry date, CVV etc. just enter your VPA and use your mPIN for payment that's it.
Also see: Debit card fraud be alert from fake banking calls
So who ever use UPI they have to create VPA for them, then you don’t need to share your banks account details. Now don’t take stress on how to create VPA, when you use the UPI app you will create it in the registration process.
For sending and receiving payment you can use any Indian bank UPI app with a unique username called VPA (Virtual Payment Address). For example username@pnb, username2@sbi
though you can also use Aadhaar number to receive payment and other old methods like Account number and IFSC code, MMID and mobile number.
What is exactly Virtual Payment Address (VPA)
In UPI payment system you create a unique username like a unique email id for your bank account such as username@sbi. So whenever you want to receive payment you just give your unique id and that's it, and this unique id known as virtual payment address.Even when you are doing online shopping you don't need to enter your bank name, your name, debit card number, card expiry date, CVV etc. just enter your VPA and use your mPIN for payment that's it.
Also see: Debit card fraud be alert from fake banking calls
So who ever use UPI they have to create VPA for them, then you don’t need to share your banks account details. Now don’t take stress on how to create VPA, when you use the UPI app you will create it in the registration process.
How to Register on UPI App
The procedure is really simple just download your bank UPI app from Google play store. If you don’t know which is your bank UPI app just search on Google for example SBI UPI app. Though you can use any bank UPI app but then your VPA might look different. For example, if you use ICICI UPI app your VPA will be like username@icici if you use PNB UPI app your VPA will be username@pnb.
Note: There are few UPI apps on google play but always use bank UPI apps. you can use any bank UPI app because you can trust those apps.
- So I would recommend you to download your bank UPI app from Google play store and install on your android device. In this tutorial, I will be using SBI app to guide you. But don’t worry the procedure is almost similar for all UPI apps.
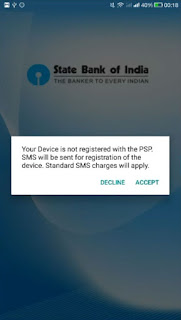
- Now open the app and it will ask the permission to verify your mobile number which is connected to your bank account through SMS. So just accept it and select the SIM for sending SMS. Make sure you select the correct SIM which is connected to your account.
- Then this app will wait for the SMS and when it arrive it automatically detect it. Then it will display your number just confirm the number.
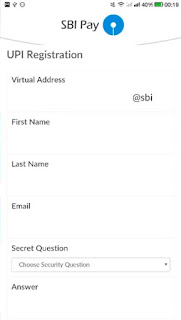
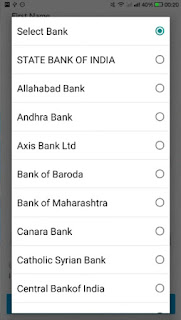
- Now UPI Registration process will start. Enter the virtual name you like and other details such as email, name, answer and your bank.
- Then accept the term and condition and click next.
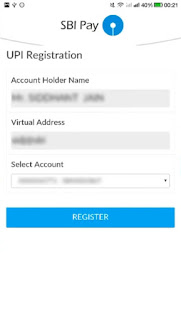
- Now you will see your bank account if you have multiple bank account select the account and click register.
- That’s it you have successfully completed UPI registration process. You will also receive SMS within few seconds.
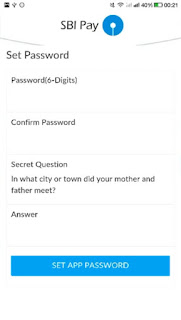
- Now you have to set a 6 digits password for this app. Then you will have to open the app using the password you have created.
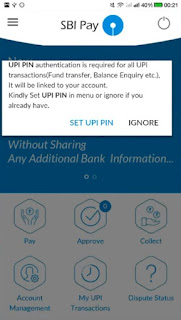
- Now app will ask you to SET mPIN for all UPI transactions like transferring fund, balance inquiry etc.
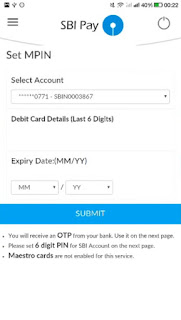
- In the process of creating mPIN app will ask you to enter your debit card last 6 digits enter it and then enter debit card expire date and submit.
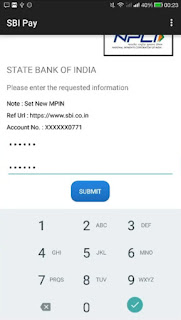
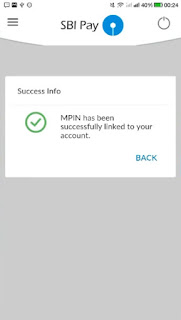
- Now you will receive an OTP (one-time password) via SMS enter that OTP to confirm and then set your mPIN and submit.
- Everything is done now you can send and receive payment using UPI app.
How to Send Money Using SBI UPI App
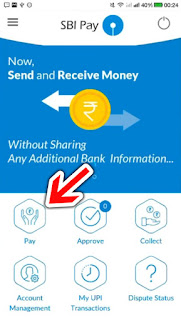
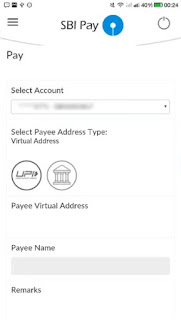
- Tap on pay and select UPI then make sure UPI is selected. Enter the VPA(virtual payment address) of recipient. UPI App will automatically detect the recipient name.
- You can enter anything in the remark like “paying bill etc”. Then enter the amount you want to send and tap on pay.
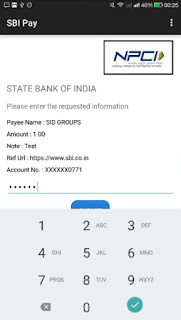
- After that enter your mPIN you have created for UPI and submit, that’s it you have successfully paid the amount to the recipient.
What is the Benefit of UPI
- It is the future of cashless payments. You don't need bank account number and IFSC code or MMID and mobile number of the payee.
- There is no restriction on UPI app you can use any UPI app which you like.
- You don't need to swap your card anywhere. It’s like SMS you send it he received it payment confirm that’s it.
- There is no restriction of waiting 24 hours for next payment for the new payee. You can send any time when you want.


 Hey Friends
Comment your suggestion, problem or Question